
Infrared IR Wireless Remote Controller Module Kits DIY Kit HX1838 for Arduino Raspberry Pi

Infrared IR Wireless Remote Controller Module Kits DIY Kit HX1838 for Arduino Raspberry Pi
Infrared IR Wireless Remote Controller Module Kits DIY Kit HX1838 for Arduino Raspberry Pi Infrared IR Wireless Remote Controller Module Kits DIY Kit HX1838 for Arduino Raspberry Pi Infrared IR Wireless Remote Controller Module Kits DIY Kit HX1838 for Arduino Raspberry Pi


Features:
 

Latest infrared wireless remote control kit consists Mini Slim 38KHz IR remote control and infrared receiver modules, Mini Slim infrared remote control with 17 function keys, firing distances of up to 8 meters, ideal for a variety of devices in the control room. IR receiver module can receive standard 38KHz modulation remote control signal, through programming, you can achieve remote control signal decoding operation, which can produce a variety of remote control robots and interactive works.
 
Specifications:

 
  • Transmission Distance: 8m above (specific and surroundings, the receiver sensitivity and other factors)
  • Effective angle: 60 degrees
  • Sticking Material: 0.125mmPET, the effective life of 20,000 times.
  • Quiescent current 3-5uA, dynamic current 3-5mA.


Step 1: Assemble Circuit:


aeProduct.getSubject()

You will need one Arduino for this. I used a UNO, but just about any Arduino should work. First wire up the infrared receiver that came with your kit. There are 3 wires, PWR, GND, and SIG, I used port 11 for SIG. Note! some readers have reported that their sensor has different wiring, double check it yourself.


Step 2: Download IR Library

aeProduct.getSubject()

aeProduct.getSubject()

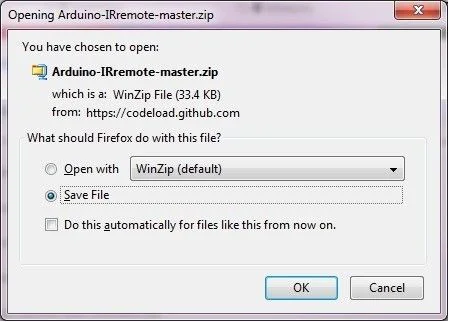
In order to reverse engineer the remote and obtain the codes for each button we are going to need to download and install the following library.

https://github.com/shirriff/Arduino-IRremote 

Extract the file in your libraries directory. e.g.  ( C:electronicsarduino-1.0.5libraries )
note: I had to rename the library because the name was too long, I just renamed it to IR.

Step 3: Add Library to sketch


aeProduct.getSubject()

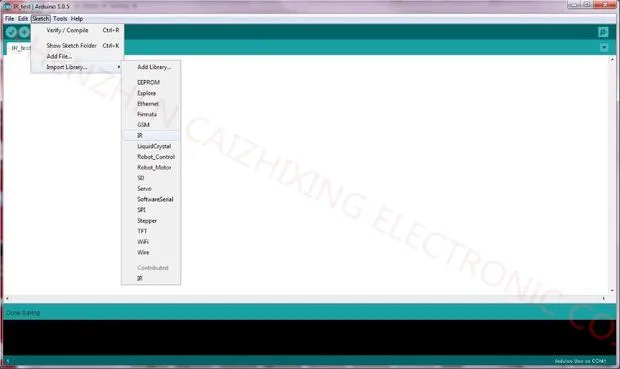
With the IR folder ( or whatever you named it) now in your libraries directory, we can import it into a new sketch.

Start a new sketch and the Click  

        Sketch->Import Library->IR.

Step 4: Paste Code and compile

Paste the following code into the new sketch. Then verify it compiles.

#include <IRemote.h>

int RECV_PIN = 11;

IRrecv irrecv(RECV_PIN);

decode_results results;


void setup()

{

  Serial.begin(9600);

  irrecv.enableIRIn(); // Start the receiver

}


void loop()

{

  if (irrecv.decode(&results))

    {

     Serial.println(results.value, HEX);

     irrecv.resume(); // Receive the next value

    }

}

Step 5: Open the serial monitor


aeProduct.getSubject()

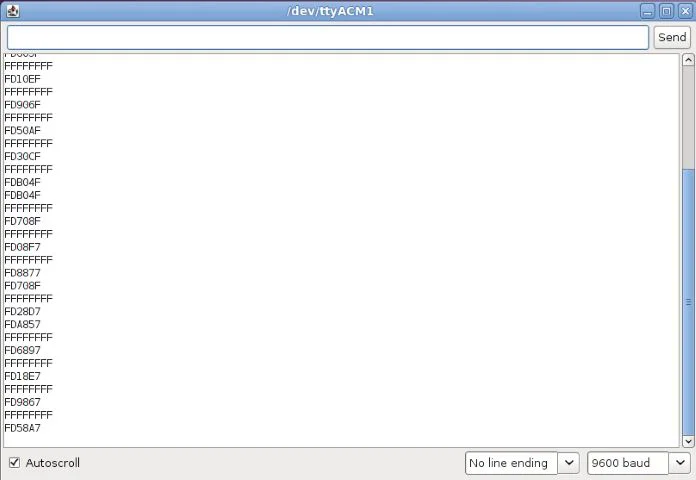
Connect the Arduino to your computer using the usb port, then upload the sketch. Open up the Serial Monitor, get the remote and press the buttons. Some hex codes should appear on the Serial Monitor.

Step 6: Record button codes

  Step 7: Works on any remote!


Infrared IR Wireless Remote Controller Module Kits DIY Kit HX1838 for Arduino Raspberry Pi See detail


Popular posts from this blog

SX1308 DC-DC 2V-24V to 2V-28V 2A Adjustable Boost Regulated Power Supply Module High Current

Get SX1308 DC-DC 2V-24V to 2V-28V 2A Adjustable Boost Regulated Power Supply Module High Current Introduction:   The SX1308 boost module is equipped with the SX1308 chip, which has a small package and high efficiency. The output is adjustable up to 28V, and the internal integration of very low RDS internal resistance 100mΩ metal oxide semiconductor field effect transistor (MOSFET) can achieve high current output within 2A. Widely used in 3G network products, digital products, mobile power, battery-powered equipment.   Features:   Oscillation frequency 1.2MHz, efficiency up to 95% The circuit has short circuit protection, overheat protection and other functions 10K price potentiometer, adjust voltage output   Parameters:   Input voltage range: DC 2V-24V Output voltage range: DC 2V-28V Switching frequency: 1.2MHz Output current: ≤ 2A Package includes: 1 x Power supply module SX1308 DC-DC 2V-24V to 2V-28V 2A Adjustable Boost Regulate...

Wire Connector SPL-4 Quick Terminal 4 Position Docking Connector High Power Connector

Get Wire Connector SPL-4 Quick Terminal 4 Position Docking Connector High Power Connector Feature: Rated Voltage: 600V/2.5KV Rated Current: 32A Soild Wire Size: 0.08-2.5mm 2 /28-14AWG Multi-folded Soft Wire Size: 0.08-4mm 2 /28-12AWG Strip Length: 9-10mm/0.35-0.39inch Plastic Material: PA66 V-2 Shrapnel: Stainless Steel Contact Material: Electrolytic Copper Nickel Tin Ambient Temperature: -40 ~ +105 degree Package included: 1 x SPL-4 Wire Connector Wire Connector SPL-4 Quick Terminal 4 Position Docking Connector High Power Connector See detail

LM2596S DC-DC 24V/12V To 5V 5A Step Down Power Supply Buck Converter Adjustable USB Step-down Charging Module

Get LM2596S DC-DC 24V/12V To 5V 5A Step Down Power Supply Buck Converter Adjustable USB Step-down Charging Module Features: Synchronous rectification scheme, wide voltage input, high current output, high efficiency. With DC plug and terminals, easy to use. With USB port, with fast-charge identification chip compatible with Andrews and iphone mobile phone.   Product parameters:   Input voltage: DC 9V - 36V The output voltage: 5.2V / 5A / 25W Output capability:  9 ~ 24V Input: Output 5.2V / 6A / 30W                              24 ~ 32V Input: Output 5.2V / 5A / 25W                              32 ~ 36V Input: Output 5.2V / 3.5A / 18W Size: 63 x 27 x 10mm (L * W * H) Weight: 22g   Package included: 1 x LM2596S DC-DC 24V/12V To 5V 5A Step Down Module LM2596S DC-DC 24V/12V To 5V 5A Step Down Power Supply Buck Converter Adjustable USB Step-down Charging Module See detail